Showing posts with label Beer. Show all posts

Monday, January 20, 2014

Skink Saison

I made up another batch of saison this weekend, much the same as the Saison Wit but with a more traditional grain bill. I mashed 4kg of Pilsner malt at 64 degrees for 90 minutes and I added a kg of Pilsner malt extract and 1/2kg of wheat malt extract at the end of the boil, but apart from that followed the same recipe as before. One thing I did notice was the Original Gravity (strength) was higher - I haven't run the numbers yet but I think the mash was more efficient, either due to the longer standing period or the slightly lower mash temperature. It'll be interesting to see how it differs from the Wit equivalent.

Whilst I was brewing one of our resident skinks (collectively known as the 'Fredlets') came out to supervise
 'No - it needs more hops!'
We have a number of these living both in and around the house and they're the source of most of the slightly unnerving rustlings we hear in the undergrowth.
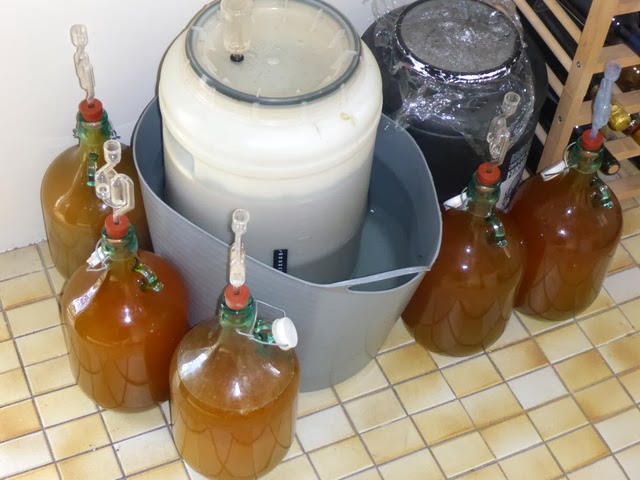
The ones inside the house hang out in the laundry, and they definitely give you a fright when they scurry across the floor at night when you're on the way to the loo. The fermenters are also stored in the laundry, which is one of the reasons why I couldn't get away with open fermentation right now.
"Can I get a beer brewed by lizards?"

Wednesday, January 8, 2014

Yeasty frothy goodness

Back in the day before Louis Pasteur no-one really knew what yeast was or how it worked. They just knew that if you stored certain foodstuffs in a certain way in a certain place then magical things would happen and you'd end up with beer / mead / wine / bread / more beer. The unknown ingredient was simply known as godisgoode 'bicause it cometh of the grete grace of God'.

This time-lapse video showing 'open-fermentation' brewing at Sierra Nevada brewing company helps explain why it was held in such regard. This is a traditional style of brewing that is still used by several breweries because it's easy to skim and re-use the yeast, it decreases carbon dioxide pressure on the yeast (which helps the flavour profile) and the kit is easier & cheaper to maintain than a sealed vessel with an airlock. . I'd love to try something similar, but at the minute I'd just end up with a brew-bin full of ants & lizards...

Monday, January 6, 2014

Jarringly cool

One of the cool things of the moment is to use Mason jars as serving implements, and as usual we're surfing the zeitgeist in Mt Gravatt. Perfect for relishing a Summer Ale brewed by a local artisan craft brewer
Although it works equally well holding a gin-based cocktail...
Although to keep true to type these photos should be being posted on Instagram...

Friday, January 3, 2014

New Years Eve Parti-Gyle Partial Mash Vatted Wit

Back in the days before refined sugars were common it was down to the brewer to get all of his fermentables out of the grain that he was using. Initially the grain (mainly barley) was left to germinate but was then heated to stop the germination process, which trapped the sugars that would have been used to feed the young shoot inside the grain. This is the malting process. The grain was then broken into smaller pieces to open up the hard outer shell  - this is known as cracking. The cracked grain was soaked in water at an appropriate temperature (generally around 62-68 degrees C), which triggered off enzymes inside the grain which help pull the trapped sugars  out of the grain and into the solution. This is known as the mashing process, and it produces a sticky sugary solution called a wort. And finally the grains were separated from the wort and washed down with water in order to pull out every possible bit of sugar - this is called the sparge. The weird names are because these processes have been carried out for hundred and maybe thousands of years, long before the introduction of hops into brewing, by many different cultures and in many different ways. I like to think that whenever I brew I'm not just making beer, I'm making history come alive.*

In Medieval times the brewers needed to provide differing strength ales for their different customers, and one of the ways of doing this was to use 'Parti-Gyle Brewing'. With this system the first runnings (ie the original wort), which are rich in sugars and highly fermentable, were used to brew strong beers. The grains were then sparged and the subsequent infusions used to produce less strong beers - important not just for a 'common' beer (what we'd call a session beer) but also because the water quality could be so poor that the brewing process actually made it drinkable.

I decided to try a variant on the parti-gyle style brew process with grains left over from my Saison-Wit. I sparged the grains a second time and made sure that they were thoroughly dunked, squeezed, poked and massaged in order to extract as much sugar as possible. I ended up with around 10l of liquid with a gravity of around 1.018.

This is only enough sugar to produce a very weak brew, so I needed to add some more fermentables to it - somewhat defeating the object I know, but it's not just interesting and fun, it also makes more beer. True parti-gyle brewing would have produced about 5 - 10l of a strong (9%)  brew and around 15l of around 4-5% beer.

I boiled the insipid mix for half an hour or so with 10g of Hallertau and it smelt overly sweet and a bit tart. I think that I may have inadvertently introduced a wild yeast into the mix by washing the grain in room temperature water which was adding a lambic or sour element (often known as 'vatted'). Coincidentally this is a desired trait of some Wit beers so I thought I'd press on regardless...
I added in half a kilo of wheat malt and the same of pale malt half an hour into the boil with 15g of Saaz and finished off with 15 g of Saaz, the zest of an orange and two chamomile teabags with 5 minutes to go.
It's a small batch so I pitched with half a packet of genetic wheat beer yeast, although the ambient temperatures may be a bit much for the yeast to handle. Not much I can do about that though.

I'll only get 10 bottles or so from this and there's a lot that could go wrong but it's been a fun experiment. And rest assured I'll drink a bottle and monitor its effects for 48 hrs before I hand any out!

*More importantly, I'm making beer.

Saison Season

My original plan was to make an all-grain wit beer just after Xmas, but we're going through a heatwave at the minute (38 degrees C today, higher tomorrow!) so I've given up trying to keep the beer temperature down and am once again embracing saison yeast. However I had the grain for a wit beer pre-ground, so I thought I'd try a Wit / Saison hybrid.

The dominant factor in a Wit beer is the use of wheat, so my grain bill was

2.5kg malted wheat
1kg pale malt
0.5kg Munich malt

but my hop schedule was more akin to a saison or an American pale

50g Northern brewer (60 min)
45g Saaz (30 min)
45g EK Goldings (5 mins)

Because of the small proportions of my brewpot I've decided to give up trying to max out the sugars in an all-grain brew and instead just add extra malt extract to hit the right gravity. So in some ways I'm doing a Brew-In-The-Bag partial mash, I think! The process was -

Mash grains in a brew bag @ 67 degrees for 1 hr
Drain & squeeze bag into the brewpot for 5 minutes or so
Put the brewpot back on the heat and sparge (ie soak) the bag in 70 degree (ish) water for 10 minutes or so before draining & squeezing
Add the sparge water to the brewpot (which was just about coming to boil)
When it comes back to the boil, throw in the 60 min hops and start the clock
Hop according to schedule, and add 1kg malt extract at around 30 minutes
Relax and have a homebrew

You need to be careful adding the hops to a near-boiling mix as the extra surface area you're introducing to the liquid gives lots of nucleation sites - ie points for a boil to spontaneously occur. In real terms that means that after you throw your hops in and without changing the heat your pot will go from this
to this, and beyond 
in about 20 seconds. So keep an eye on it and better still brew outside to minimise any clean-up. That also means that you can do other manly things as the boil continues...
The first sparge is in the pot and it's close to full, but there were still extra sugars available in the grain. Previously I've carried out a second sparge, boiled and cooled that and added it to the fermenter(which means a lot of additional faffing around) so this time I decided to try to make a weaker beer out of the final sparge - I'll cover that in more detail in the next post.

After that it's business as usual - cool, strain into fermenter, add yeast, wait and plan the next brew. Which will be another saison pitched directly onto the same yeast trub, but this time using pilsner malt & extract (with a touch of wheat for body) with the same hop schedule. Will be interesting to compare the two side by side... 


Tuesday, December 31, 2013

Dandelion Wine Part II

Last week I harvested dandelion petals for a dandelion wine, boiled them up with some other ingredients and left them in a fermenter with some yeast. After a week or so the vegetable matter had risen to the top of the fermenter and was forming a raft, under which hopefully goodness was happening. Some people suggest stirring the mix daily to break up this raft, others view it as a 'cap' under which safe fermentation can take place. In my view it would depend on if you were around and if you could be bothered to regularly sterilise a spoon.  
After a week or so you've got all the flavours that you're going to get out of the solids, so strain everything into another fermenter or other container such as a demijohn - but don't fill to the top. Don't be too fussy about little bits getting through the sieve, they'll get filtered out further down the line. Equally the yeast will get through the sieve so you won't need to worry about re-pitching at this point. 
I like to mix & mash the remaining solids up with a spoon for a bit  to get all of the flavour & sugar out of it 
As you can see the next day the clingfilm / glad wrap was bulging because the yeast was fizzing away underneath, gobbling down sugars and producing carbon dioxide as a side product.
After that just cover and leave it for a month or so to fully ferment out - if you have a hydrometer you're looking for a gravity of around 1.006, but then again if you own a hydrometer then you probably know that already. If not, leave it until all signs of activity have died away!

Monday, December 23, 2013

Dandelion wine

Summer has lead to a dandelion explosion in our garden, somehow triumphing where the grass has given up
Dandelions are a non-native species in Australia but are very widespread and considered a weed. Which is a shame, because like nettles they have a whole host of medicinal and culinary applications. If they grew in a remote Amazonian rainforest then they would be being touted as a superfood. You can use all of the plant - the leaves as salad garnish, the taproot in soups and stews and the petals as edible decoration - and there are a host of health benefits assigned to it.
You can also brew with it - either using the leaves and stalks as a bittering agent in beer (as was done in the days pre-hops) or using the flowers to make a white wine. I needed to mow the lawn and it seemed a waste to let so much good produce go to waste so I thought I'd go for the latter.
 
First off you need to harvest your dandelion petals. Some recipes suggest using the whole flower, others just the petals, and I found it was just as quick to grab the flower and snip at the base of the petals, leaving the green stub on the stalk. 
It's a hot and tedious business though, and best left to cheap immigrant labour
Some of the websites suggest harvesting in the middle of the day, but after half an hour outside at 11am on the longest day of the year all I'd achieved was this many petals and a mild case of sunstroke
The next morning I went back out and finished it off.
How many petals do you need? Theoretically it's roughly the same volume as the wine that you're trying to make, but in reality it's the number of petals you can pick before your back gives out, you get sunstroke or you get bored of passing dog-walkers asking you why you're moving your lawn with a pair of scissors.

Once you've got your petals pour boiling water over them and leave to soak for a day or two. Then add in another few litres of water, bring to the boil and add blended / chopped raisins, lemon zest, lemon juice and sugar. Quantities depends on how much wine you want to make and what you have to hand - I used 700g of raisins, 2 lemons & 2kg of sugar . That will give me roughly 10 bottles of wine at around 10% alcohol by volume (I think!).
Boil for a few minutes to make sure the sugar dissolves and then take off the heat. Country wine making is a little different to beer because the flavours don't come out in the boil, instead you add the whole of the contents of the cooled pot (or 'must') to a fermenting bucket, lumps and all (although I took out the lemon segments in case the pith gave a bitter taste). Mix in wine yeast and yeast nutrient, cover and leave for a few days to a week to get the initial fermentation going.
I'll add further posts as I carry out the next steps because wine making has as few more processes than beer and takes longer to reach a drinkable state. 
 
The petals I used were harvested on the Summer solstice, so if all goes well we'll be able to crack the first bottle on the evening of the Winter solstice, watch the night sky and enjoy a taste of summer sunshine.

Edit - Part II is here

Thursday, December 19, 2013

Christmas Wit

What do you make with the following ingredients -

Zest of grapefruit, orange and lime - is it just me or do the fruit look somehow bashful in their nakedness?
Mix with cranberries, cloves, star anise and cinnamon and then soak in brandy for a few days
Soak 300g of oats in 70 degree water for 30 minutes or so, run through a sieve and keep the gooey liquid
 Bring to the boil with four more litres of water, just don't let it boil over
Add the fruit & spice mix and boil for 20 minutes or so
With 10 minutes to go mix in 2kg of wheat malt & 1 can of wheat beer concentrate. Bring back to the boil for a few minutes, turn off the burner and throw in 40g of Tettnanger hops
Cool overnight and strain into a clean fermenter the next day, then top up to 23l or so. I pitched directly onto an existing wheat yeast trub from my ginger beer, so there will probably be additional spiciness coming through, but that will hopefully suit the beer 'style'. I'll also dry hop with 15g of Cluster once the initial krausan dies down. 

As you may have guessed this is my Christmas beer...I was a bit disorganised this year (hence the use of concentrate) so it'll turn out to be more of a late January beer, but if it tastes half as good as it smelt then it should still be tasty!

Friday, December 6, 2013

Ginger spice

If you hadn't noticed, Christmas is looming fast and in Australia that means sun, humidity & refreshing ginger beer. I had some success with my ginger beers last year but it still wasn't 'bitey' enough for me, so this time I thought I'd start by upping the ante a bit more...

  • Just over 1.5kg ginger, cleaned, frozen and then run through the grater-thingy on the blender (sorry blender)
  • 2 lemons, sliced
  • 2 limes, sliced
  • 2 star anise
  • 4 birdseye chillis, sliced
  • 2.75kg raw sugar (ish, there was a partially used bag which I didn't bother weighing)
  • 1kg wheat malt extract (liquid)
Boil the above for an hour, and with 5 minutes to go add 5g crushed Tasmanian pepper berries & another 4 sliced birdseye chillis

After taking off the boil add juice of two lemons & 3 limes

I left it to cool overnight, strained it into a fermenter and sprinkled WB-06 yeast on the surface. This is a wheat beer yeast and although I should claim that the intention was that the esters of bubble-gum & clove will complement the ingredients, the reality was that it was the only yeast packet I had left in my homebrew box. Although I think that the esters of bubble-gum & clove will complement the ingredients nicely. 

This won't quite be ready for Christmas but should be good to go for the New Year. Can't wait!


Friday, November 22, 2013

Pigs & Pints

The last time we were down in Burleigh we decided that it would be the perfect place to set up a craft beer bar. Unfortunately someone beat us to the punch, but fortunately they located it right next to our hotel. The Pigs & Pints is well worth a visit for friendly staff, its fine range of Burleigh Brewery beers on tap, a wide range of bottled beers and some very tasty American-themed bar snacks.

It's on the Gold Coast Highway just behind Burleigh Arcade  and looks like this
Sadly it's also only open on Wednesday - Sunday, which on a hot Tuesday afternoon with a thirst for hops was a very unfortunate thing indeed...
They need a flag they can hoist when they're open so that local hotel residents need only descend from their balconies when it's worth it...

Thursday, October 24, 2013

Extract brew - with extras

A few months ago I brewed a Stone & Wood clone (named 'Clone & Wood') using tinned, pre-hopped malt extract . The beer was easy to make, crisp, clean, very close in flavour to the original and went down all too easily. Since then I've become embroiled in the world of all-grain and although I enjoy the brewing and the beer, it is a time consuming method.

Because of this I thought I'd try another extract brew this week and get something in my fermenter before I go away. I've based this on a 'Summer Ale' recipe but I'm using Danny's extract techniques, as outlined in the link above. The brewing part was done in an hour or so, it cooled overnight with minimal water and then I spent another 20 minutes or so this morning straining & cleaning. Easy.

So the recipe is -

Take 1 can Coopers Cerveza & 1 can Coopers wheat malt and stand in hot water for 5 minutes or so. Open the tins and pour into a largeish pot (at least 8l).
Add 2 litres of boiling water & 1/2 kg raw sugar, stir well and bring to the boil.
Throw in 50g fuggles hops - I wrapped mine in cheesecloth to make a 'hop bag' but I won't do that next time, mainly because if the hops don't circulate in the pot they don't get utilised properly.
Boil for 20 minutes or so.
Throw in 20g dried sweet orange peel, 2 tbsp. crushed coriander seeds, 25g of chopped ginger and 25g East Kent Goldings (I added these in a hop bag at first but they didn't seem to be having much effect so I opened the bag up and mixed them in).
Boil for another 10 minutes or so.
Put a lid on the pan and leave the whole lot in a sink surrounded by cold water overnight.
Tip into the fermenter through a clean sieve and top up to desired volume with filtered water.
Add yeast (although I pitched mine onto the yeast trub from a previous brew), keep cool and ferment.

And that's the brew day. After the initial ferment dies down I'll throw in a hop bag with 50g of Galaxy to dry hop it and give that fresh grapefruit aroma, and then it's business as usual.

My fermenters are now maxed out - 24l of Jaggery IPA ageing in secondaries, 1 demijohn of strawberry cider and 23l of Summer Ale. I think it's going to be a good summer...


Monday, October 7, 2013

Adventures in all-grain no 3

After my last all grain session I took away a few ideas on how to improve the process that I was keen to try out. The first was to set up the mill outside, to limit the clean-up process
This worked well, although grinding 4 1/2kg of barley in the middle of the day was hard, hot work. Next time I'll do it the evening before!
I also ground the barley to a much finer level this time, which should enhance the yield of sugars that I can extract out of it with my 'brew in a bag' style method.  
I hit my first hurdle after bringing the water to temperature  - when I poured the grain into the stock pot / brew kettle it didn't slide into the water in the way that it usually does - the finer grind meant that it sat on top of the water and formed little clumped islands. I needed a lot more and more vigorous stirring to break the lumps up and get the grain into the pot, and that lead to a bit of messy overflow. Next time I'll take more water out of the pot, and add it in afterwards.

Apart from that the mash, sparge & boil went as normal. I used 4 1/2kg of Marris Otter and 1kg of wheat with a 90 minute mash and then dunk sparged twice, as before. This will be an IPA so I used 80g of Fuggles at the start of the boil and 120g of East Kent Goldings with 5 minutes to go, and I added in a kilo of jaggery with 30 minutes to go. Jaggery is a Sri Lankan palm sugar with a rich caramel flavour, and to enhance the maple notes I also used a couple of teaspoons of fenugreek seeds. The use of 'adjuncts' like sugars & herbs to change the flavour profile and to boost the sugars is a little contentious in  brewing, but as you may have guessed I don't really care about the Reinheitsgebot.

After the boil was done I let the beer cool in a waterbath in the laundry sink overnight. Then I transferred it to the fermenter - normally I scoop the wort out of the pot by hand and pour it through a sieve to catch the hop pellets, but this time I tried re-using the brew bag in the fermenter as a kind of filter. It was a lot quicker to pour the wort directly in, but then I needed to hoist the bag out and let it drain off. So the overall time saving turned out to be minimal.
Admittedly that may be due to the ridiculous amount of hops I'm using! 
The other mistake I made was not boiling all of my sparged wort the day before. Remember I'm dunking my 'used' bag of grain into water in order to extract the most sugars out of it, and then using that slightly sugary water to add to my fermenter to minimise the dilution of the beer. That sparge water needs to be bought to the boil to sterilise it before it's added to the beer, and then cooled back down to room temperature again. I'd used up all my big pots on the main boil so had to do this the following day, which added a lot to the 'faff factor' and tied up the laundry sink for another half a day - I think next time I'll invest in a 25l 'beer cube' (essentially a large plastic container) and use that to hold both the hot main wort and the sparge water overnight. That'll save on water and will also free up a pot.

The other problem I have is the heat - we're in the middle of a Spring heatwave at the minute and the temperature of the laundry is reaching 30 degrees during the day. This is too high for the yeast I'm using so I'm resorting to iced waterbaths and evaporative cooling by soaking an old hoody in water. That hoody kept me warm on any number of camping trips - it's huge so fits over anything else I'm wearing - and it's funny to think of it keeping beer cool now. Not sure how effective it is, I may need to switch to Saisons early this year.
Speaking of recycling, the warmed water goes on the garden and the used grains &b hops go in the compost bin
Hmm - grain, hops and a collection of miscellaneous vegetable matter. I could chuck some yeast in and make a beer out of that....   

Friday, September 27, 2013

Armakeggon

Last Sunday was 'Armakeggon', a craft beer festival at Archive bar. There were more than a few beers to sample
 and even at just before 11am more than a few people waiting to sample them
This year they offered the beers in 100ml tasting cups, which meant lots of back & forth to the bar but it also gave you the chance to try a number of different beers without writing yourself off. Too quickly. Here are three of the ciders, mid sample 
We were lucky enough to grab a seat on the balcony upstairs, with a great view of the world walking past underneath  
but we weren't there to gawk at passers-by, we were there to drink!
The beers were many and varied, and I've only got pictures of a few. This is a 'Golden Age of Bloodshed' spiced Saison
and these are a 'Caramel Zombie Assault' (on the left) and a Saison Dupont (on the right). The combination of slightly salty toffee and banana made a kind of liquid banoffie pie
Other standouts included the Rogue XS IPA, the Gypsy Tears lambic stout, the Love Tap hoppy lager and the Craison crayfish saison. The latter (made from marine crayfish, not yabbies - I checked!) was most intriguing with a nice fresh saison-style fruity mouthfeel at the start and a faint lingering taste of fish. Fun to try, but I didn't go back for another and unusually for me I'm not wondering how to make it myself.

We managed to try pretty much everything we were interested in and still find time to finish off with pots of our favourites. All up it was an awesome day, so thanks to Graham for being excellent company and holding the table during my frequent 'comfort breaks'. Monday was not as awesome as I had to be at a clients site at 9am for a 2hr meeting to discuss business processes for implementing strategic reporting objectives, but somehow I made it through.

Which leads me to the Friday song...Chumbawamba & Tubthumping.

Must be hard to be in Chumbawamba - their career spanned three decades and mainly comprised of anarcho-political punk music. But everyone just remembers them as a one-hit wonder with a drinking song... 

Thursday, September 19, 2013

Full size all-grain batch

After my initial experiments with 'brew in a bag' I thought I'd see how far I could take it, and whether it was possible to put together 23 litres of a 5% ish brew without needing to buy another, bigger pot. After some reading up I found that the largest grain bill that people normally use with a 19l pot is around 5 1/2 kg, so I decided on 5kg of Marris Otter & 1/2 kg of un-malted wheat berries

That took about half an hour to grind, and I added a few teaspoons of dark malt to bring a bit of colour 
It left a bit of a mess in the kitchen as well...
In the meantime I bought 17l of water up to around 78 degrees C in the stock pot. Once I hit the right temperature I took out around 3.5l in a jug and kept that close to the pot along with a 2l bottle of room temperature water and a freshly boiled kettle. I put in the brew bag, tipped in the grains, mixed well and then used the various water containers to top up the pot as much as possible whilst trying to hit around 68 degrees C
When I hit the right temperature I covered the pot in a couple of sleeping bags (yes, that is the bag I carefully washed last week laying on the dusty concrete floor) and left it for 90 minutes
At this point the classical texts say 'kick back and have a homebrew' but I had a kitchen to clean & mop
After a 90 min mash I lifted the bag and drained into the pot whilst squeezing the bag, then left it to hang and drain thoroughly.  This gave me around 10l of wort at around 1.080
As a time saving measure I put the initial wort on the heat straight away, whilst I sparged the bag in 60 degree C water for 10 minutes before hanging and draining in the same way. I'm using the table to shield the pot from the wind.  I also threw the first batch of hops into the wort before it came to the boil - this is known as first-wort hopping and adds a deeper flavour to the beer.
Once the sparge was complete I had around 8l of 1.020 gravity wort. I added as much liquid as possible to the pot and carefully let it come back to the boil. This is another reason to first-wort hop - if you had a completely full pot of wort on the boil and through in hops at that point then you'd probably get a boil-over.

To make sure I pulled all of the sugars out of the grain I carried out a second sparge with room temperature water and hung & drained the bag again. This gave me around 6l of very weak wort (1.014 gravity), and so after the main wort was boiled, hopped, cooled and strained in the usual way I added this weak wort to the fermenter to bring up the volume. Don't forget to boil it first to sterilise it though.

After all this I ended up with around 20l of wort with a gravity of 1.052, and I added a litre of water to bring it up to 21l (that volume works better with my secondaries) at a gravity of 1.050. This will give me a roughly 5.5% brew if it ferments out all the way out to dry. This is a bit disappointing as it shows I'm only accessing around 65% of the sugars that are available in the grain. I'm doing all I can to pull out available sugars so I think that the issue lay in the coarseness of my original grind. Next time I will grind a lot finer and run the grains through twice. And I'll set the grinder up outside so I can get way with leaving the cleaning to the local wildlife...